
Red Velvet Christmas Tree Cake
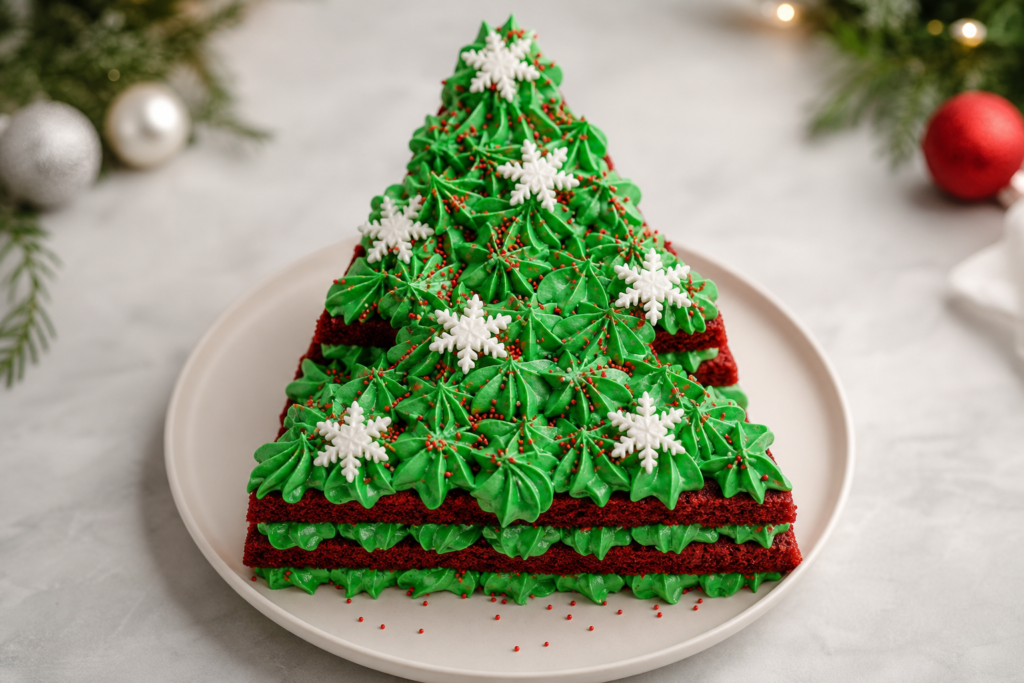
This showpiece is built from four round red velvet layers, a Swiss meringue–style buttercream, and piped green spikes to mimic tree branches. Bake layers in advance if you like, then assemble and decorate before serving.
Overview
Requires four round cakes (two 9-inch, two 8-inch, plus a small 1-cup baked portion). The frosting is a cooked egg-white and sugar base finished with butter and vanilla, then tinted green for piping.
Advance prep
Layers can be baked up to five days ahead: wrap and refrigerate. Chill the assembled cake in stages as directed during frosting and before serving.
What Makes This Recipe Work
This showpiece cake uses stacked red velvet layers carved into a tree silhouette and finished with a Swiss meringue–style buttercream that’s sturdy enough to hold piped “branches.” The cooked egg-white-and-sugar base gives a glossy, silky frosting that turns stable once room-temperature butter is worked in; that texture is what lets you pipe defined star-shaped spikes to mimic evergreen needles. The construction—two 9-inch layers, two 8-inch layers and a small 1-cup portion—lets you scale the tiers down as you build upward so the finished silhouette resembles a conical tree.
Ingredient Notes
Rather than water, this version replaces the liquid in the cake mixes with buttermilk and uses the specified eggs and oil, which gives the layers a classic red velvet crumb and flavor profile. The frosting is not a traditional buttercream: it starts with cooked egg whites and sugar that are whipped into glossy peaks, then finished by incorporating room-temperature butter and vanilla to create a Swiss meringue–style buttercream that is both smooth and pipeable. Gel food coloring is used to tint the frosting for piping, and small red sprinkles plus wafer snowflakes provide classic holiday contrast when scattered over the green piping.
How to Get the Best Result
Bake and portion: the recipe calls for baking multiple round layers and a small 1-cup portion; portioning and baking the small piece separately makes it easier to top the tree with a neat small tier. After baking, cool completely before trimming and stacking—this reduces crumb transfer into the frosting and makes trimming safer and cleaner.
Frosting technique: cook the egg-white-and-sugar mixture over simmering water until it reaches the recipe’s stated 165°F to 175°F. Whisking while heating and then beating in a stand mixer until glossy medium-soft peaks form (about the time range suggested) gives a stable meringue base. Let that whipped mixture cool until it’s no longer warm to the touch before switching to the paddle and adding butter in small pieces; this order helps prevent a broken or soupy buttercream.
Trim smartly and save scraps: when you carve the stacked tiers into the tree shape, keep all the trimmed pieces. The recipe uses those scraps mixed with a few tablespoons of frosting to form the small cone topper and to fill any gaps—this minimizes waste and ensures a uniform appearance.
Stabilize the stack: insert a long skewer or wooden chopstick up through the center of the cake stack to secure tiers and keep the cake from shifting while you trim and pipe.
Chill in stages: apply a thin crumb coat and chill for the time recommended (30 minutes) to set the crumb coat before piping. After decorating, refrigerate the finished cake for the minimum time indicated (at least 2 hours) so the buttercream firms up for cleaner slices and handling.
Serving Ideas
This recipe yields the showpiece as written—four servings—so treat it as a centerpiece for an intimate holiday table. Decorate with the suggested sparkler candle and any optional figurines (Christmas gnomes are mentioned) just before serving. Scatter the small red sprinkles and wafer snowflakes over the piped green frosting for a classic red-and-green holiday look. Because the cake is chilled after decorating, remove from the refrigerator shortly before serving so it’s easy to slice but still holds its shape.
Storage & Make-Ahead
One of this cake’s advantages is that layers can be baked up to five days ahead: wrap them well and refrigerate. Assemble and decorate closer to serving; follow the chilling steps in the recipe: set the crumb coat in the fridge for the recommended 30 minutes, then chill the finished, decorated cake for at least the two hours specified before serving. These staged chill periods are part of the timing that ensures the buttercream sets properly after piping.
Because the recipe’s directions include specific timing and temperatures for the meringue base, follow those exact steps when making the buttercream: cook egg whites and sugar to the stated range, whip to glossy peaks, cool about the time suggested, then add butter and vanilla as directed. The combination of these steps is what produces a piping-ready frosting with the sheen and body needed for the star-tip decoration.
More recipes to explore


More recipe ideas

Red Velvet Christmas Tree Cake
Ingredients
Instructions
- Preheat oven to 350°F. Grease two 9-inch and two 8-inch round cake pans with nonstick spray and line the bottoms with parchment. Also spray a 1-cup oven-safe liquid measuring cup.
- Prepare both boxes of red velvet cake mix according to package directions, substituting buttermilk for the water and using the specified eggs and oil.
- Portion batter: spoon 2/3 cup batter into the prepared measuring cup. Put 2 cups batter into each 9-inch pan and 1 3/4 cups into each 8-inch pan. Smooth the tops.
- Bake the cakes: all pans 18 to 20 minutes; the measuring-cup portion 20 to 25 minutes. Remove from oven, transfer pans to wire racks, and cool 10 minutes. Invert to remove cakes and cool completely.
- Make the frosting: bring 2 inches of water to a simmer in a medium saucepan. In a large, clean, dry heatproof bowl, whisk together 7 egg whites and 3 cups sugar. Place the bowl over (not in) the simmering water and cook, whisking constantly, until the sugar dissolves and mixture reaches 165°F to 175°F, about 6 to 7 minutes.
- Immediately transfer the warm egg-white mixture to the stand mixer fitted with the whisk attachment. Beat on medium-high until glossy, medium-soft peaks form, about 12 to 15 minutes. Let the whipped mixture cool at room temperature until it is no longer warm to the touch, about 20 minutes.
- Switch to the paddle attachment. On medium-low speed, add the room-temperature butter in small pieces, incorporating each addition before adding more. Beat in the 2 tsp. vanilla.
- Level the tops of the cakes if needed and reserve trimmed pieces.
- Assemble the base tiers: place one 9-inch cake on a serving platter and spread some frosting on top. Top with the second 9-inch cake, spread frosting, then place an 8-inch cake and spread frosting to cover an area about 6 inches in diameter in the center.
- On a cutting board, set a 6-inch plate flush to one side atop the remaining 8-inch cake and use it as a guide to trim the cake, keeping the trimmed piece intact.
- Place the 6-inch cake on the frosted 6-inch round area. Spread additional frosting to cover about a 4-inch diameter in the center of that tier.
- Shape the trimmed cake piece into a 4-inch cake using frosting to hold pieces together as needed. If necessary, use the trimmed piece from the measuring-cup cake and extra frosting to fill the center. Spread a bit of frosting on the 4-inch cake, then place the measuring-cup cake, trimmed side down, on top.
- Insert a long skewer or wooden chopstick into the center of the stacked cake to secure the tiers.
- Use a small serrated knife to trim the stacked cakes at an angle into a tree silhouette, saving all trimmed scraps.
- Crumble the reserved trimmed pieces into a bowl. Add 3 tablespoons frosting and mix; add more frosting if needed so the crumb mixture holds together. Shape this mixture into a cone about 2 1/4 inches at the base and adhere it to the top of the tree with additional frosting.
- Spread a thin crumb coat of frosting over the entire cake. Refrigerate 30 minutes to set.
- Tint the remaining frosting green with gel coloring (you should have about 5 cups). Fill a pastry bag fitted with a 1/2-inch-wide star tip two-thirds full.
- Starting at the base, pipe a single row of green star spikes about 1 inch long. Repeat rows, refilling the bag as needed, until the whole cake is covered.
- Scatter 2 tablespoons small red sprinkles and small wafer snowflakes over the piped frosting. Refrigerate the finished cake at least 2 hours before serving.
- Top the cake with the sparkler candle and add Christmas gnomes or other decorations if desired.
Estimated nutrition per serving
Insufficient nutrition data: the recipe lists packaged cake mixes, sprinkles and other ingredients without per-item nutrition facts, so a reliable ESTIMATE for Calories, Protein, Carbohydrates, Fat and Fiber cannot be calculated from the supplied information.
Helpful Tips
- Bake the layers ahead, wrap them, and refrigerate for up to five days to spread out work.
- Reserve all trimmed cake scraps—mix them with a few tablespoons of frosting to form the small cone topper and to fill gaps.
- Insert a long skewer or wooden chopstick through the center of the stacked tiers to stabilize the cake during trimming and decorating.
- Chill after applying a thin crumb coat (about 30 minutes) and again after decorating (at least 2 hours) so the buttercream firms before serving.
- Let the cooked egg-white-and-sugar mixture cool until it’s no longer warm to the touch before adding butter to avoid a soupy frosting.
Frequently Asked Questions
How far ahead can I bake the cake layers?
You can bake the layers up to five days ahead—wrap them well and refrigerate until you’re ready to assemble.
How is the frosting made safe and stable?
The frosting starts with egg whites and sugar cooked over simmering water until the mixture reaches 165°F–175°F, then whipped to glossy peaks and cooled before adding room-temperature butter and vanilla.
What keeps the stacked tiers from shifting?
Insert a long skewer or wooden chopstick through the center of the stacked cakes to secure the tiers.
What should I do with the cake trimmings?
Save all trimmed pieces; combine them with a few tablespoons of frosting to form the cone topper and to fill any gaps in the tree shape.
How long should the finished cake chill before serving?
Refrigerate the decorated cake for at least two hours before serving so the buttercream sets.
How many servings does this make?
The recipe as written yields four servings.
You may also like

Saucy Spider with Hairy Leg Sticks
A Halloween-themed appetizer made from pizza dough, marinara, Parmesan and a black olive. Makes 12…
Read more →
Halloween slash cake
What says 'Halloween party' more than this cake? Fondant icing, strawberry jam and red food…
Read more →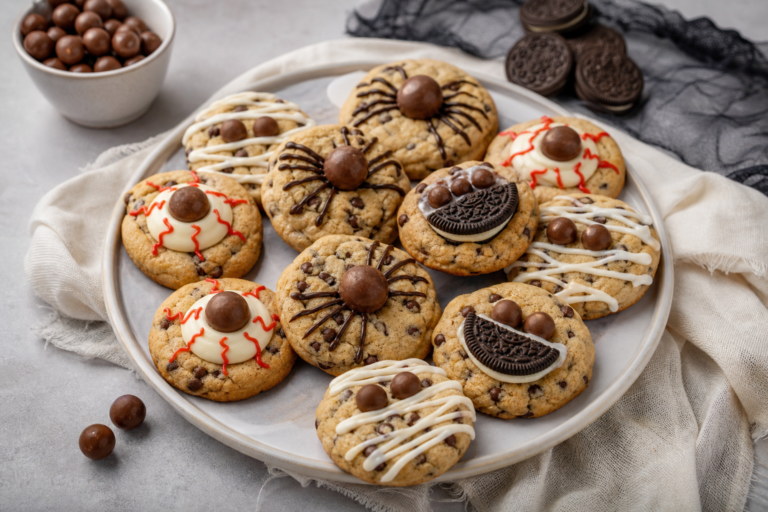
Quick and Easy Halloween cookies
A simple choc-chip cookie base transformed into 10 spiders and 10 bats — a kid-friendly…
Read more →
Halloween biscuits
Crisp ghost biscuits sandwiched to hide a pocket of popping candy (or sprinkles), then finished…
Read more →This page may contain affiliate links. We may earn a commission at no extra cost to you.